IoT Mobile App and MQTT
The Ventor IoT App is a mobile app for Android smartphones that can be used to read data from sensors and send control signals to devices. The app connects to MQTT servers and microcontroller boards over WiFi and BLE. You can use this app to manage sensors and devices on any circuits you build, as long as they support MQTT over WiFi or BLE.
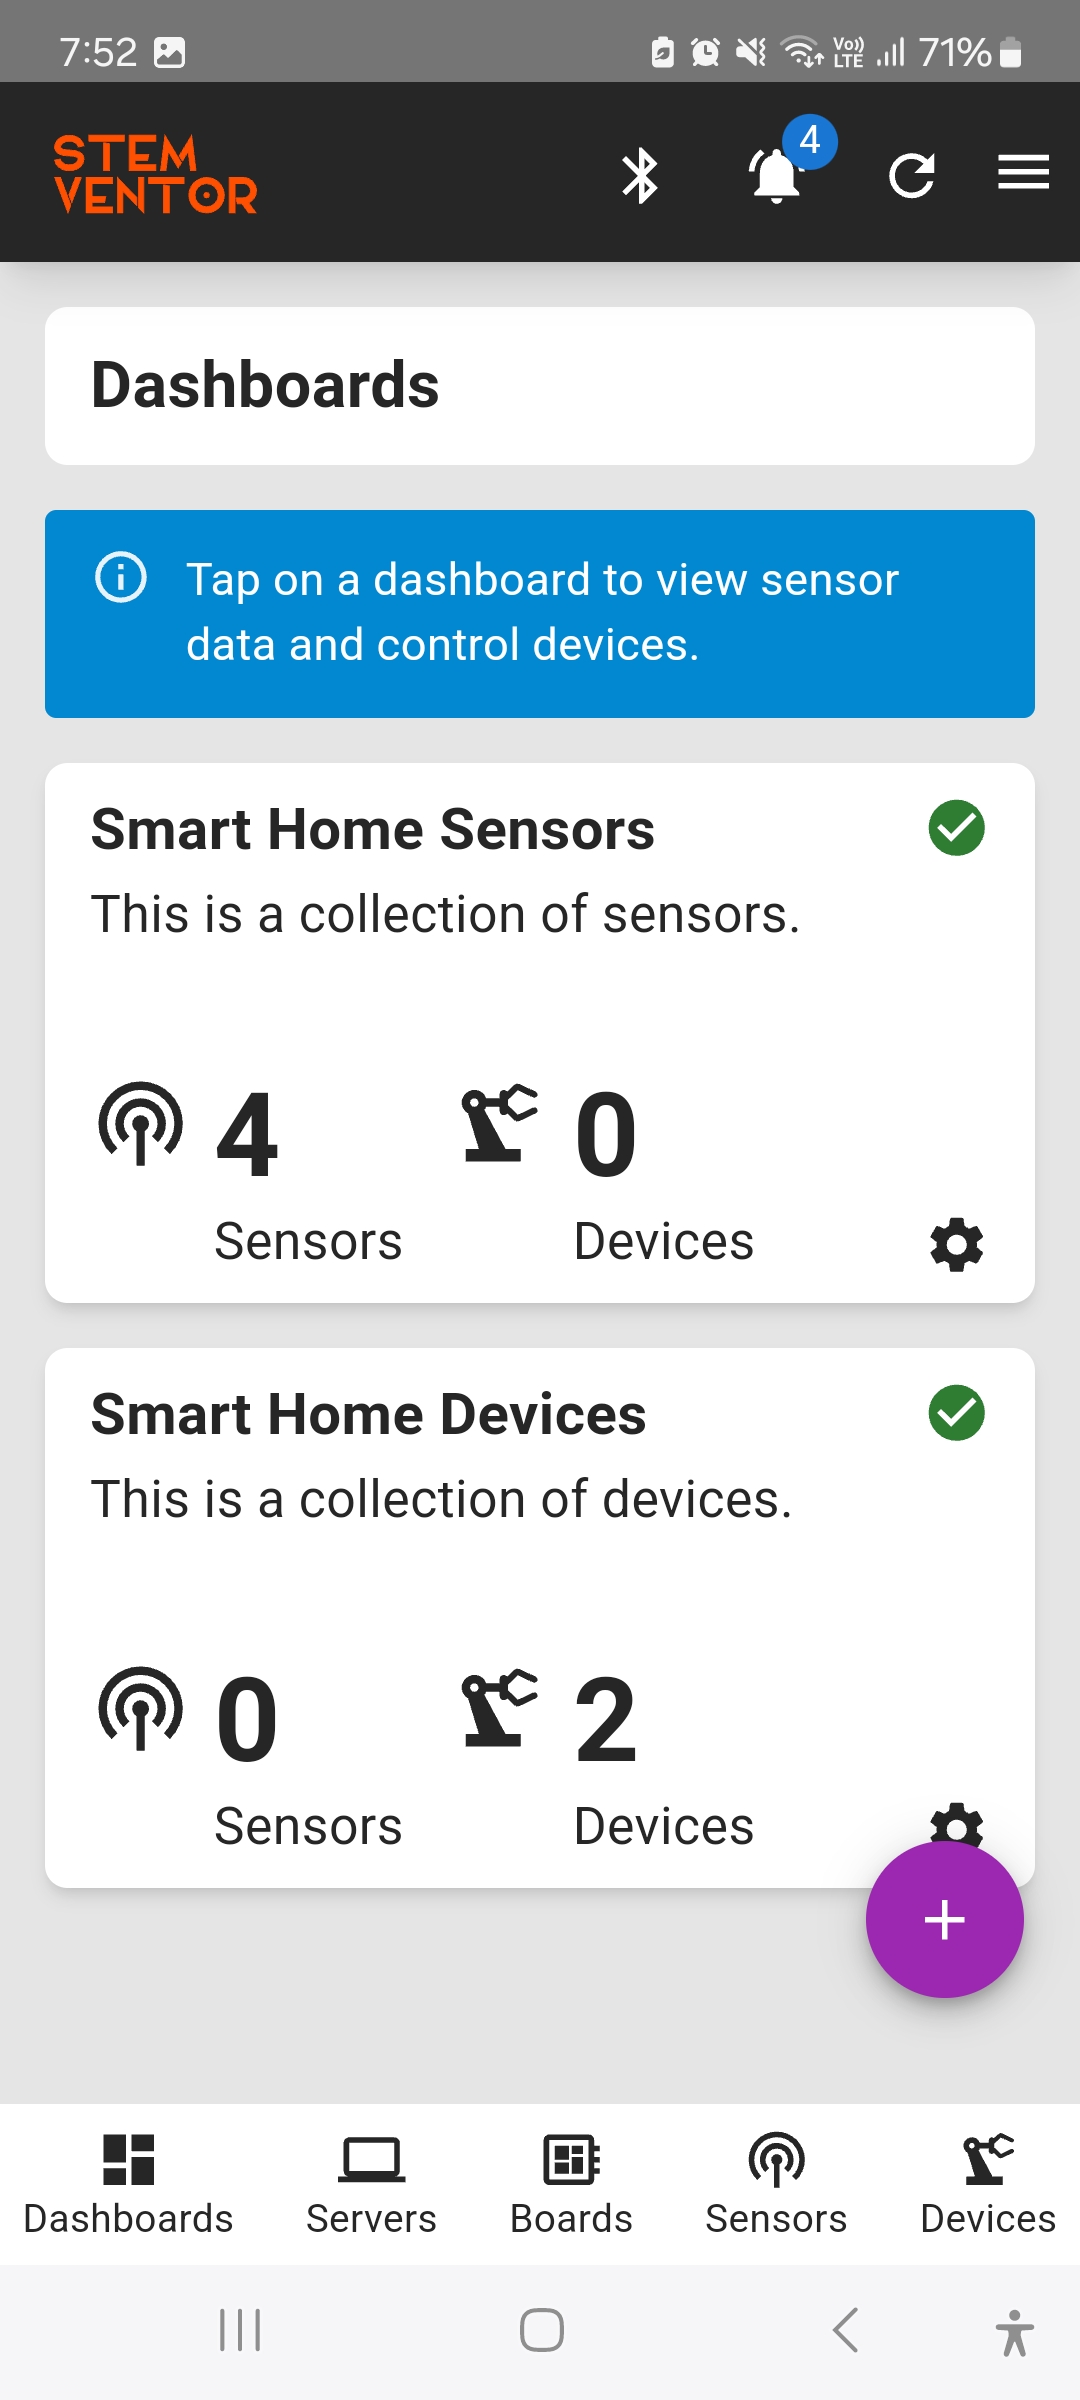
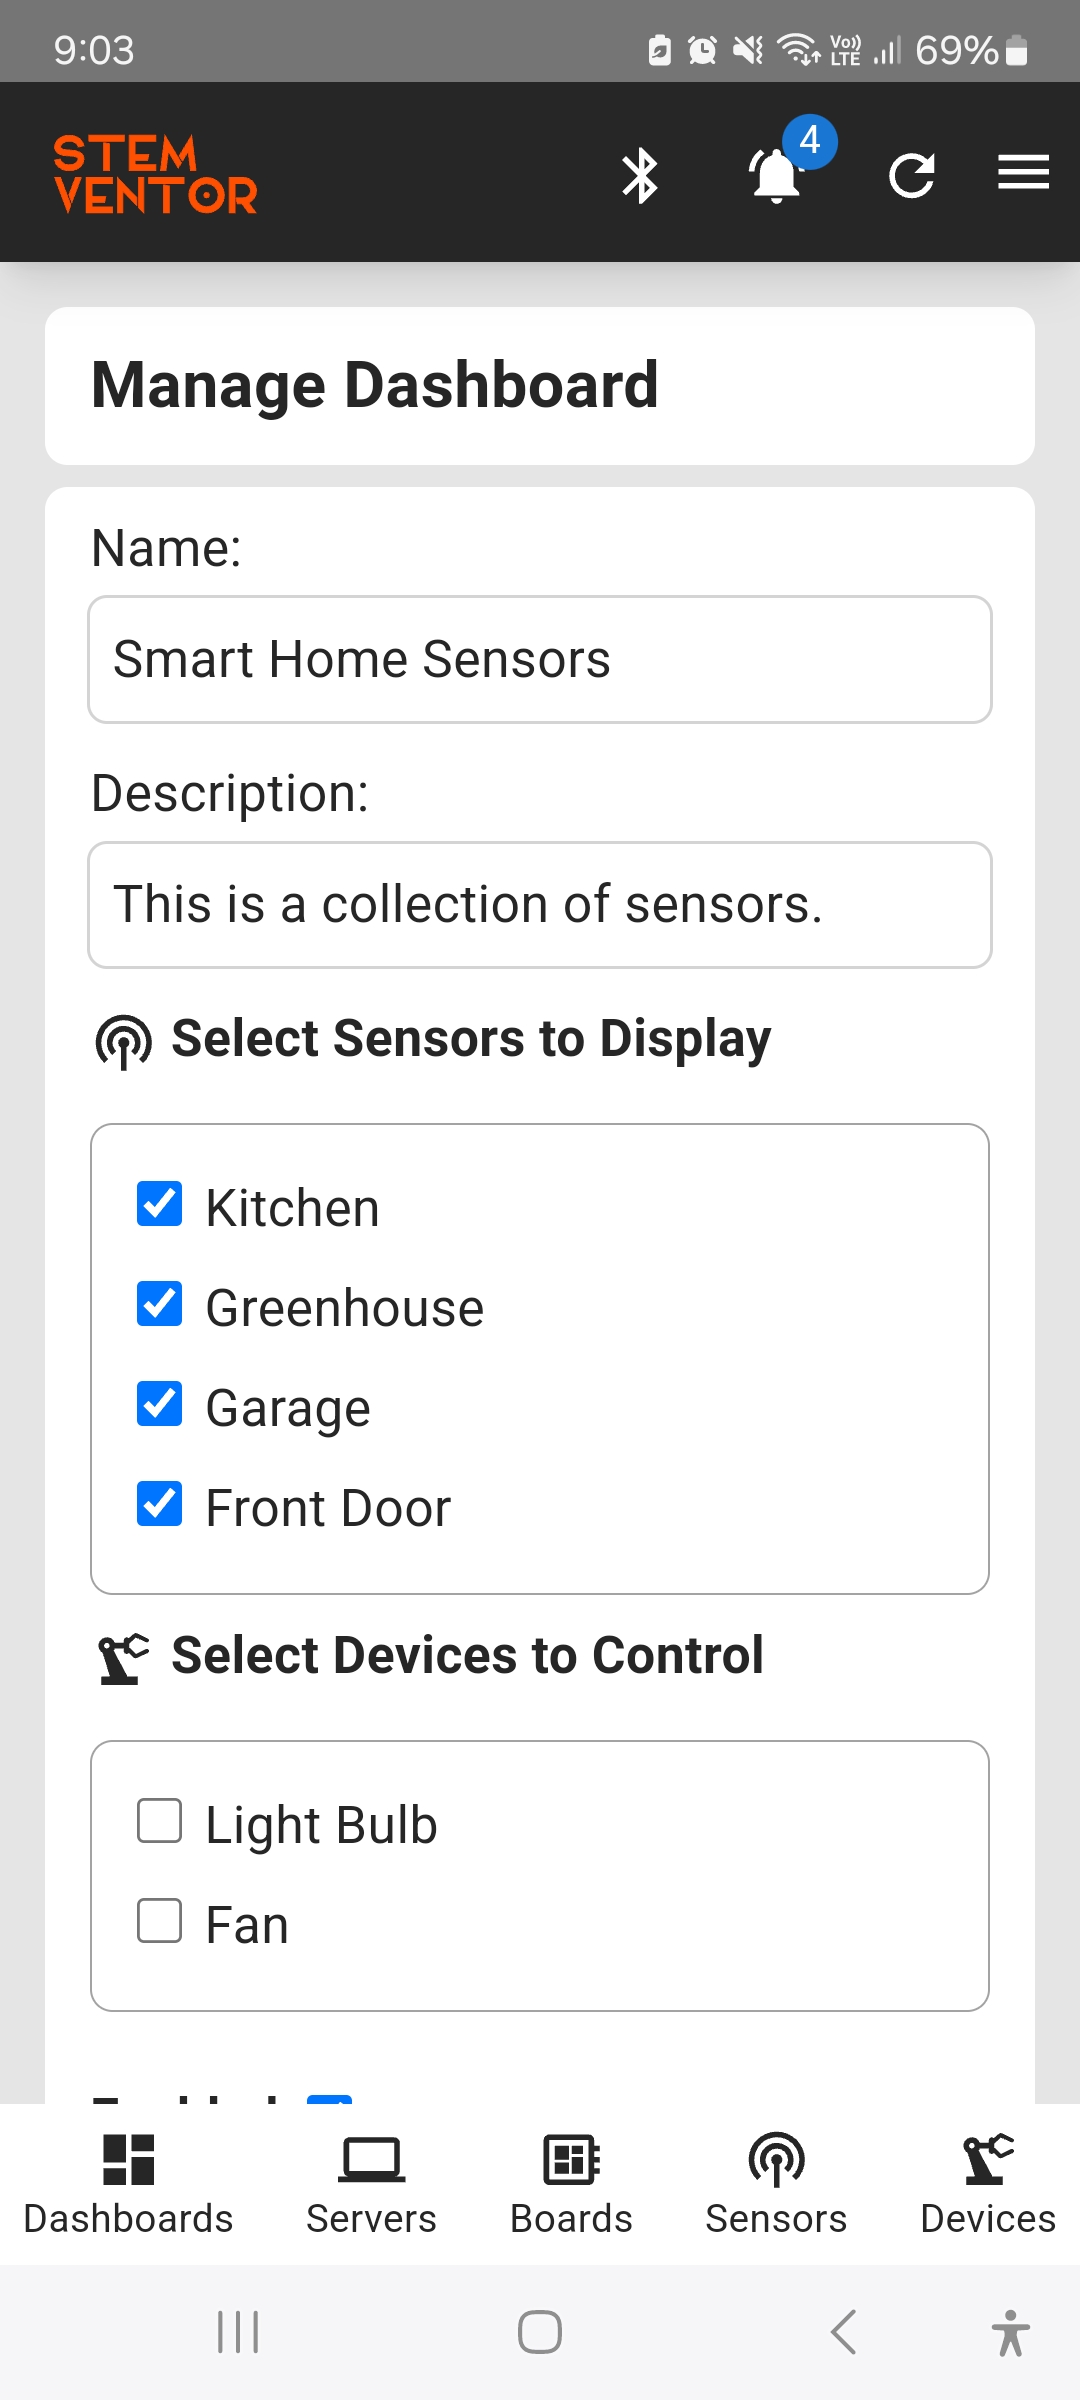
The app has a feature to create Dashboards to which you can map one or more sensors and devices to logically organized your sensors and devices.
An overview of the app concepts and user guides are presented in the following topics.
We do not get into how the mobile app has been developed but the mobile app will be available on the Google Play Store shortly for everyone to use with their circuits. We are currently running a closed group beta testing program for the app.
The mobile app requires the following components to be configured.
-
Servers (MQTT Brokers)
-
Boards (BLE Controllers)
-
Sensors
-
Devices
-
Dashboards
Dashboard Pages
- Dashboard List and Manage Dashboard
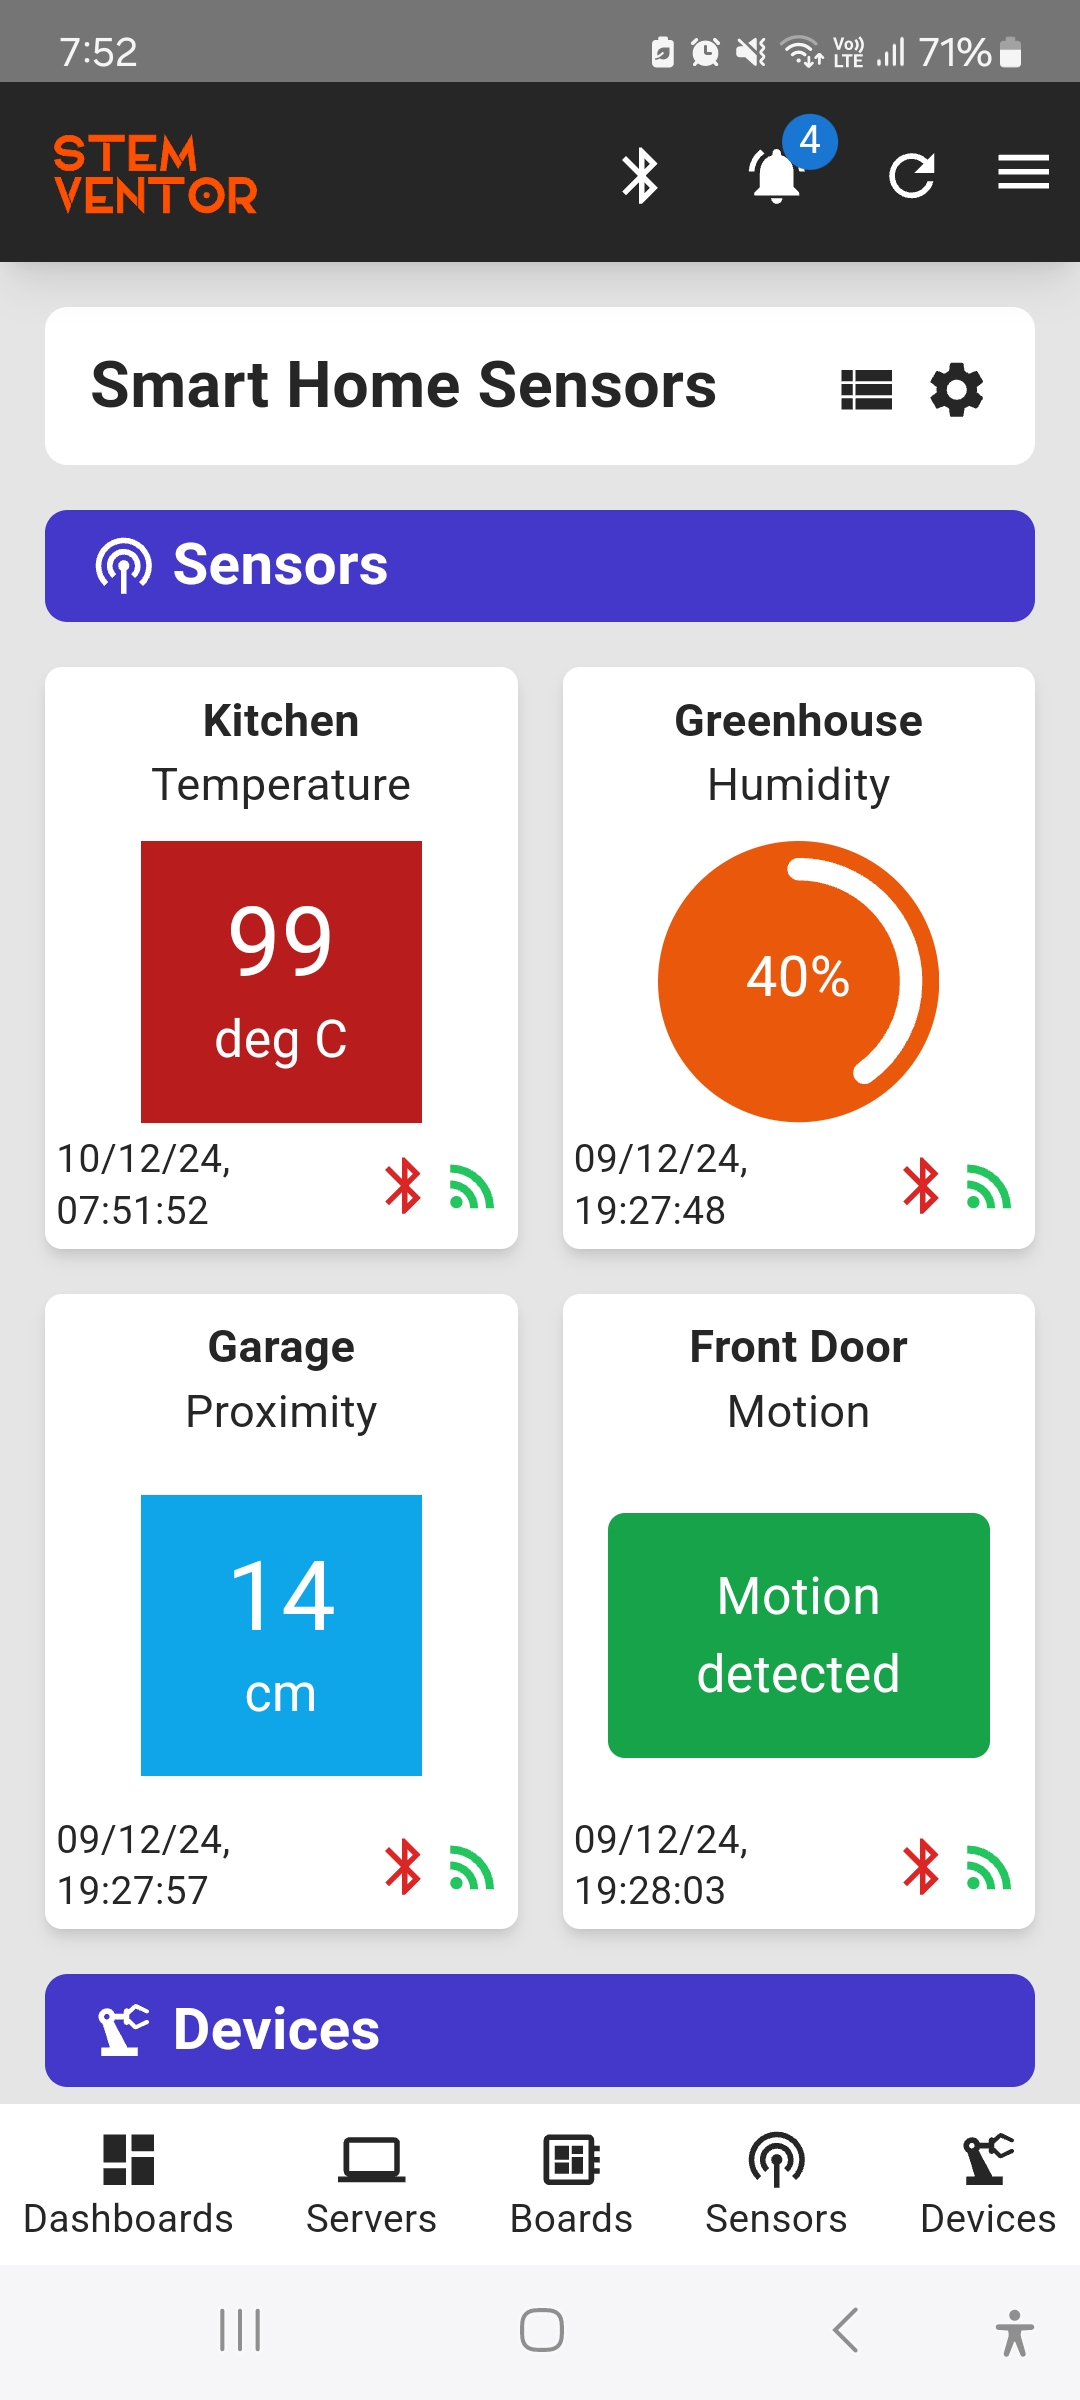
- Dashboard with Sensors and Devices
Sensors
Manage Sensors
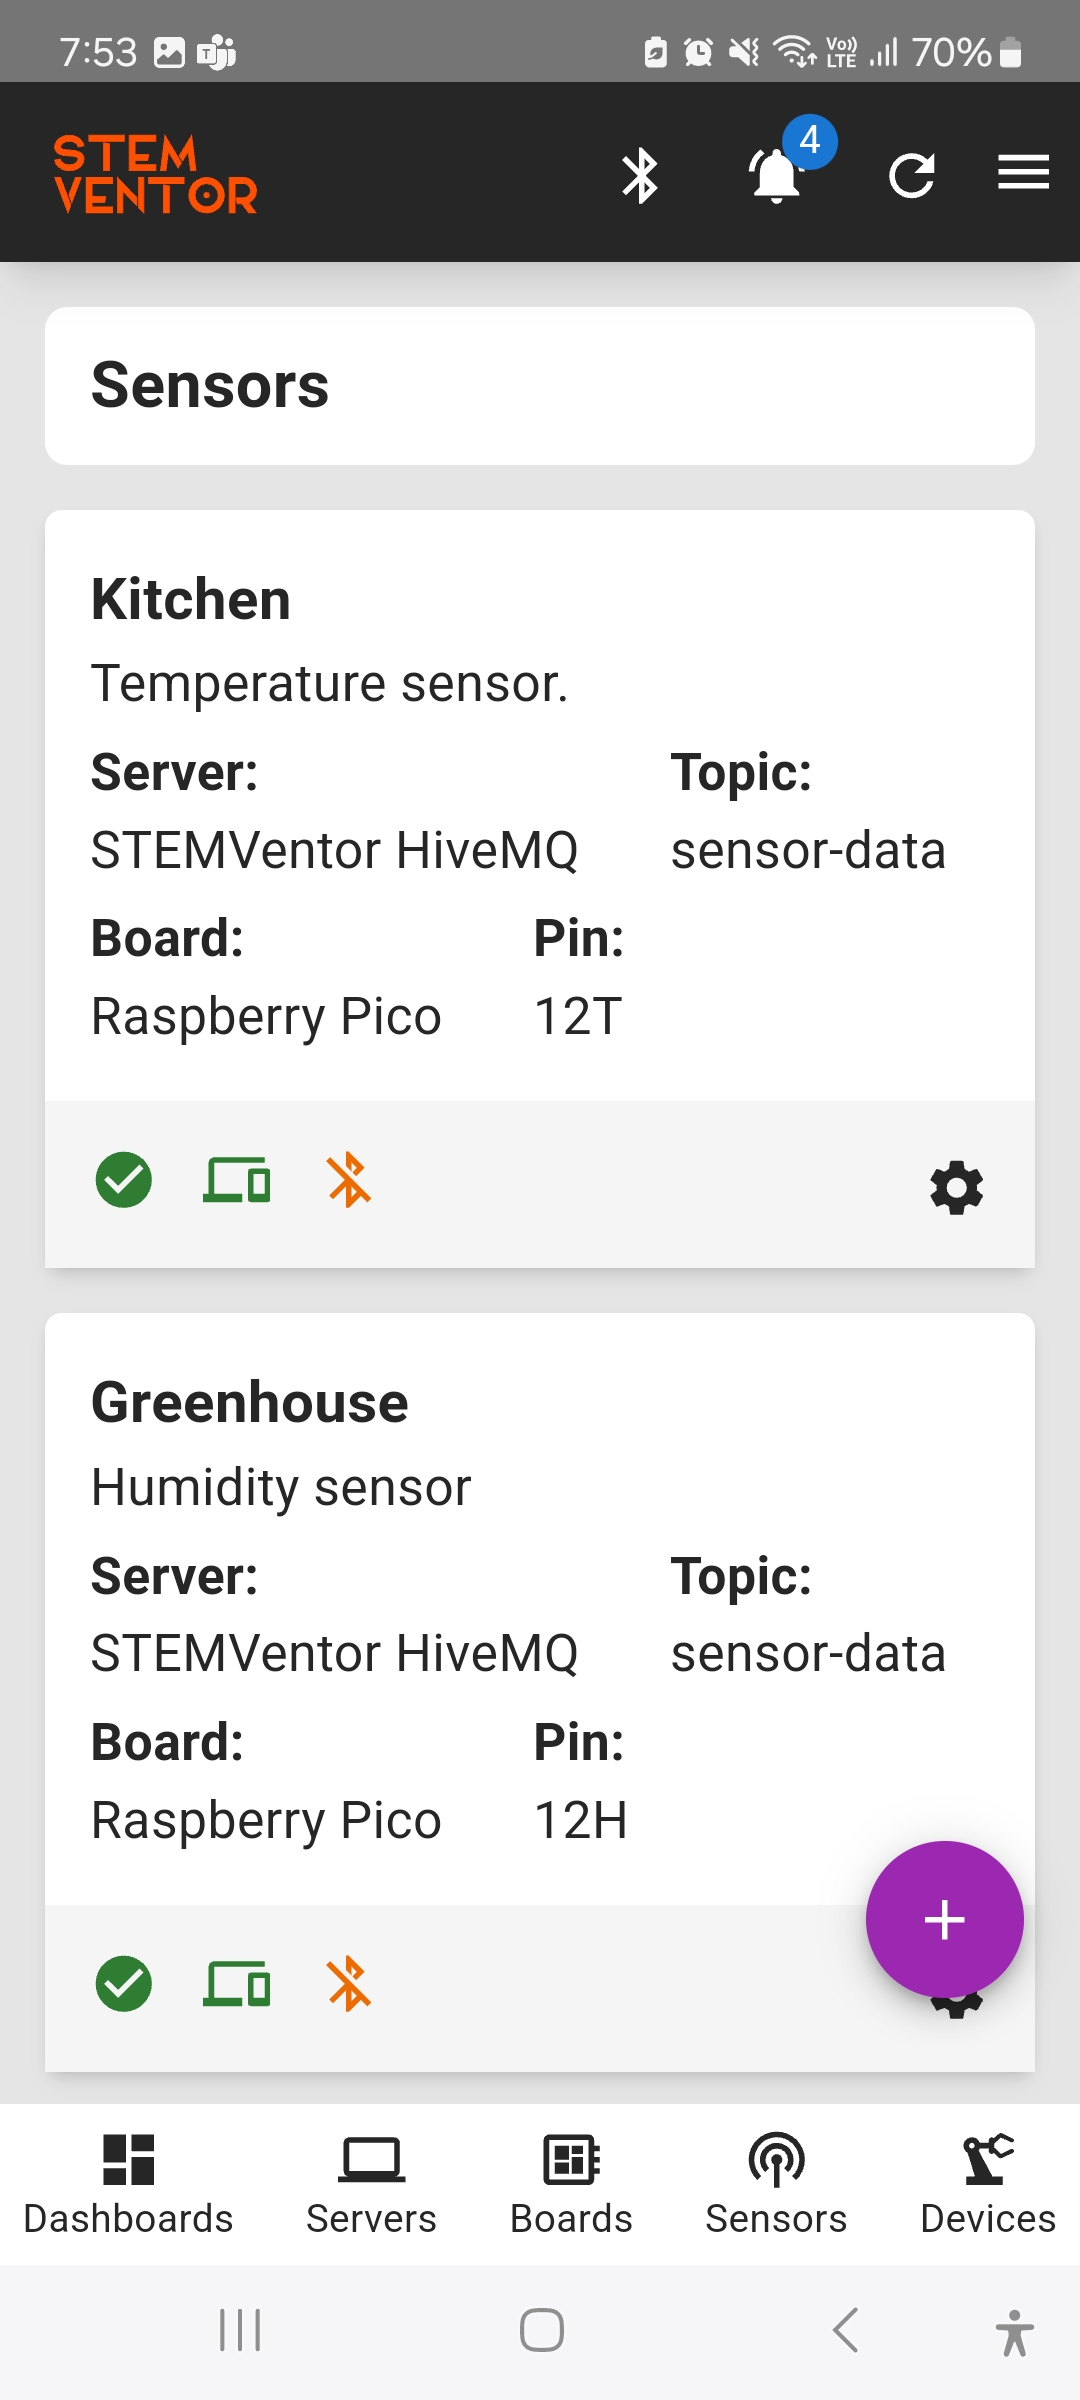
Sensors are connected to boards which send the captured data to the app over MQTT or BLE.
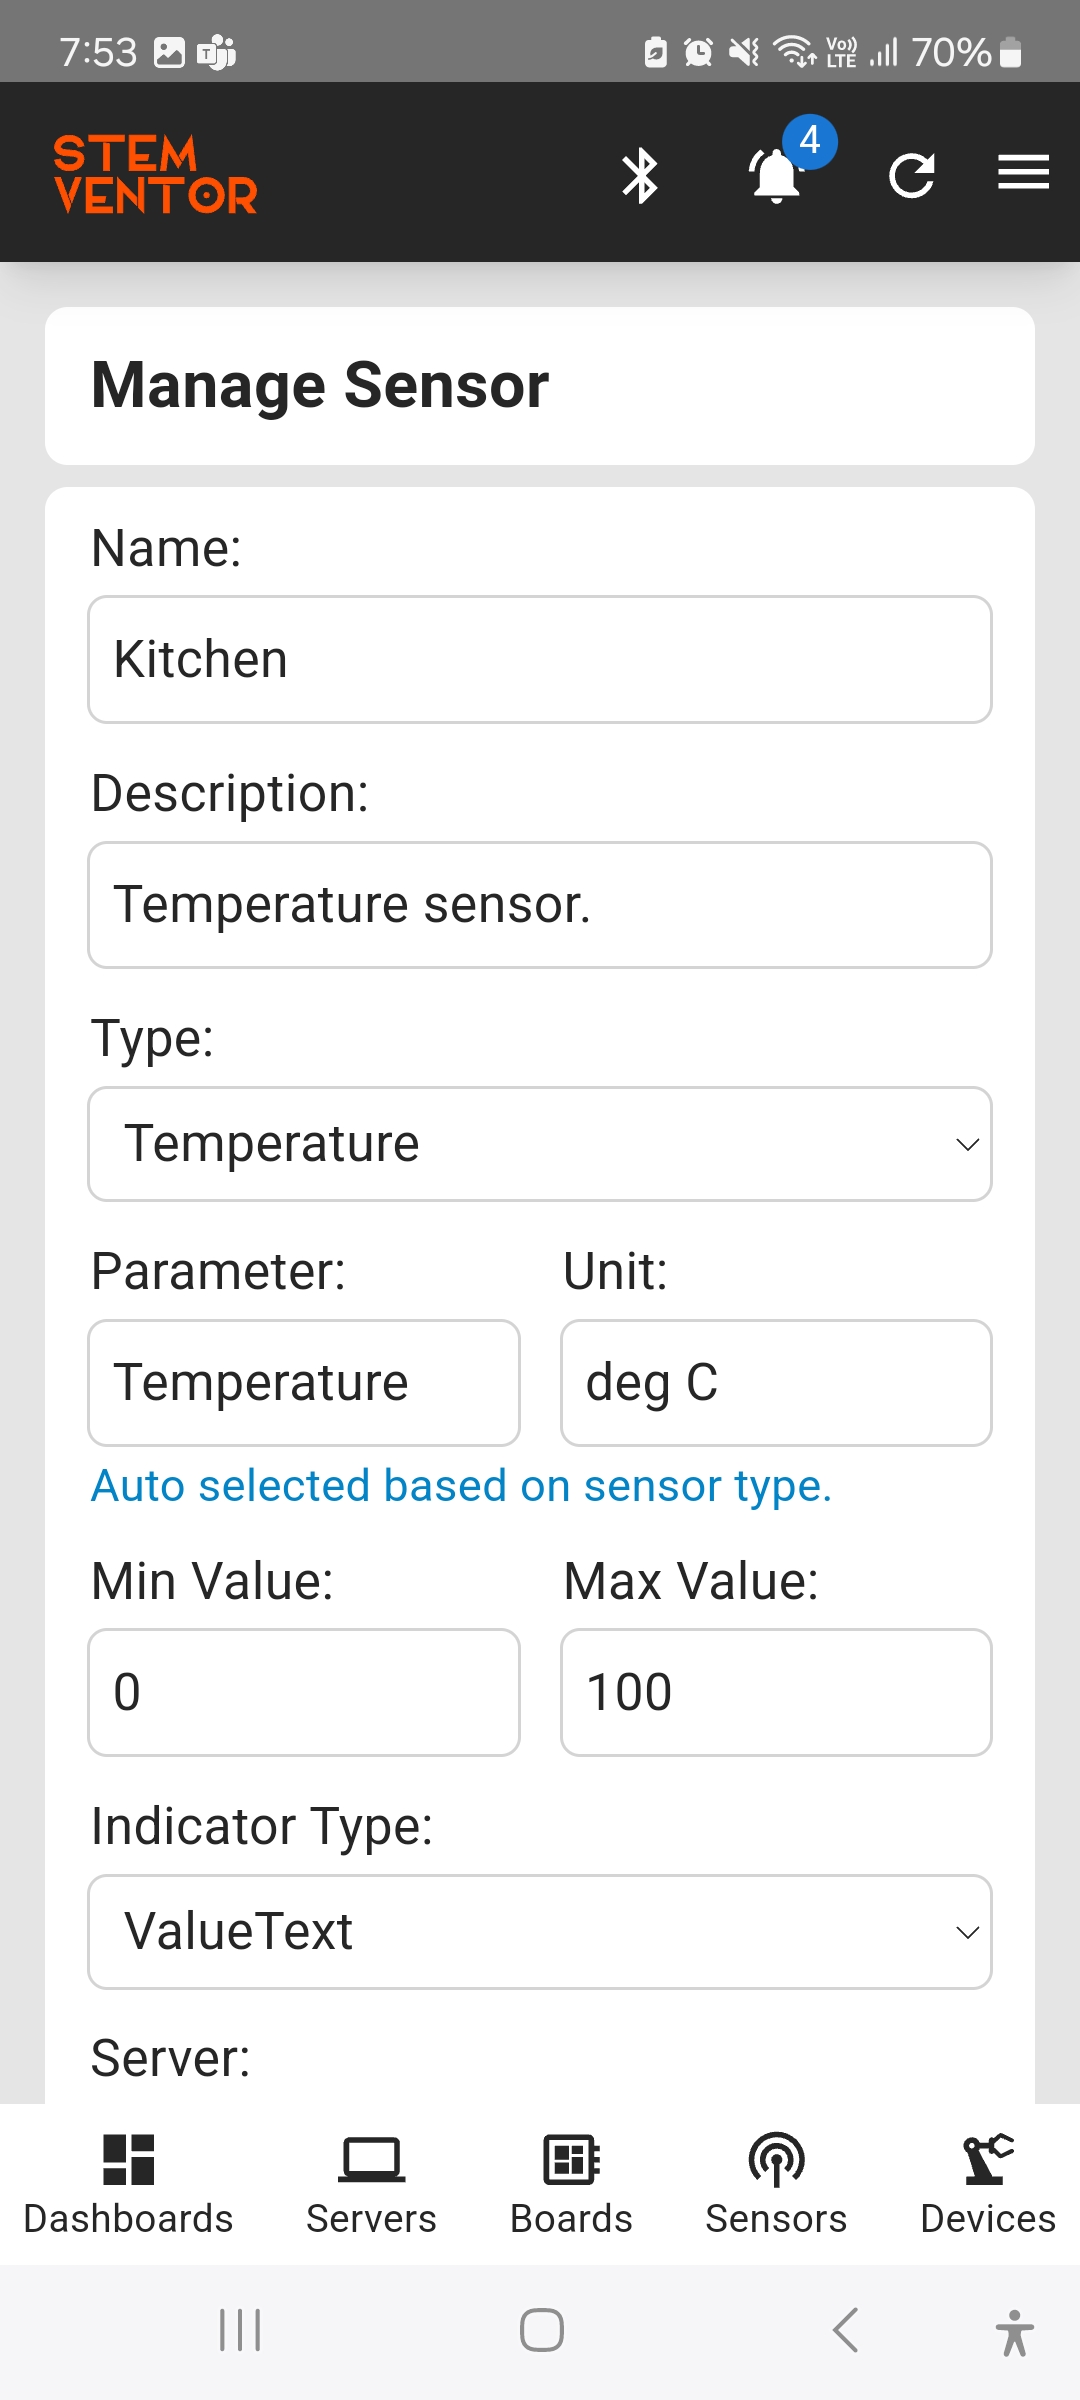
To create a sensor enter the following details in the form:
- Name
Enter a short name to identify the sensor. - Description
Enter a short description of the sensor. - Type
Select the type of sensor from the list of supported sensors. - Parameter
This is auto-selected based on the type of sensor selected. - Unit
This is auto-selected based on the type of sensor selected. - Min Value
This is the minimum value that can be expected from the sensor. This is used to filter out values that are not within the expected range so only correct values are displayed on the app. - Max Value
This is the maximum value that can be expected from the sensor. This is used to filter out values that are not within the expected range so only correct values are displayed on the app. - Indicator Type
Select an indicator type from the list. This is the visual used to display the sensor data on the dashboard. - Server
Select a server (MQTT Broker) from the list of configured servers. - Topic
This is the topic on the MQTT Broker that this sensor will publish data to. It is auto-generated based on the sensor name but can be edited. - Board
Select a board from the list of configured boards. The board must be programmed to read data from this sensor over BLE. - Pin
Enter the pin on the board the sensor is connected to. This is not used by the app specifically, it only needs to be programmed on the board correctly. The app uses this data to identify pin conflicts. - Show Historical Data
If this is selected the sensor data values are stored in memory and you can see a graph with the historical data values. The number of historical data values is limited to 10. - Enabled
The sensor is enabled by default but can be disabled if you don't want to use it for a while. - Add Alerts
Clicking on the Add Alerts button allows you to specify the values for which alerts (notifications) should be generated. Each alert has the following fields:- Min and Max Values
The min and max values specify the range for this alert to be triggered. - Severity
This is used to highlight the value displayed on the dashboard as a green, amber, or red depending on the selected severity from the options normal, warning, or danger. - Notify
If selected, a notification is sent for this alert.
- Min and Max Values
- BLE Characteristic Name
This is an auto-generated reference name to map the UUID to this sensor. - BLE Characteristic UUID
This is the auto-generated UUID that must be programmed into the microcontroller that this sensor is connected to.
Sensor Pages
Notifications Pages
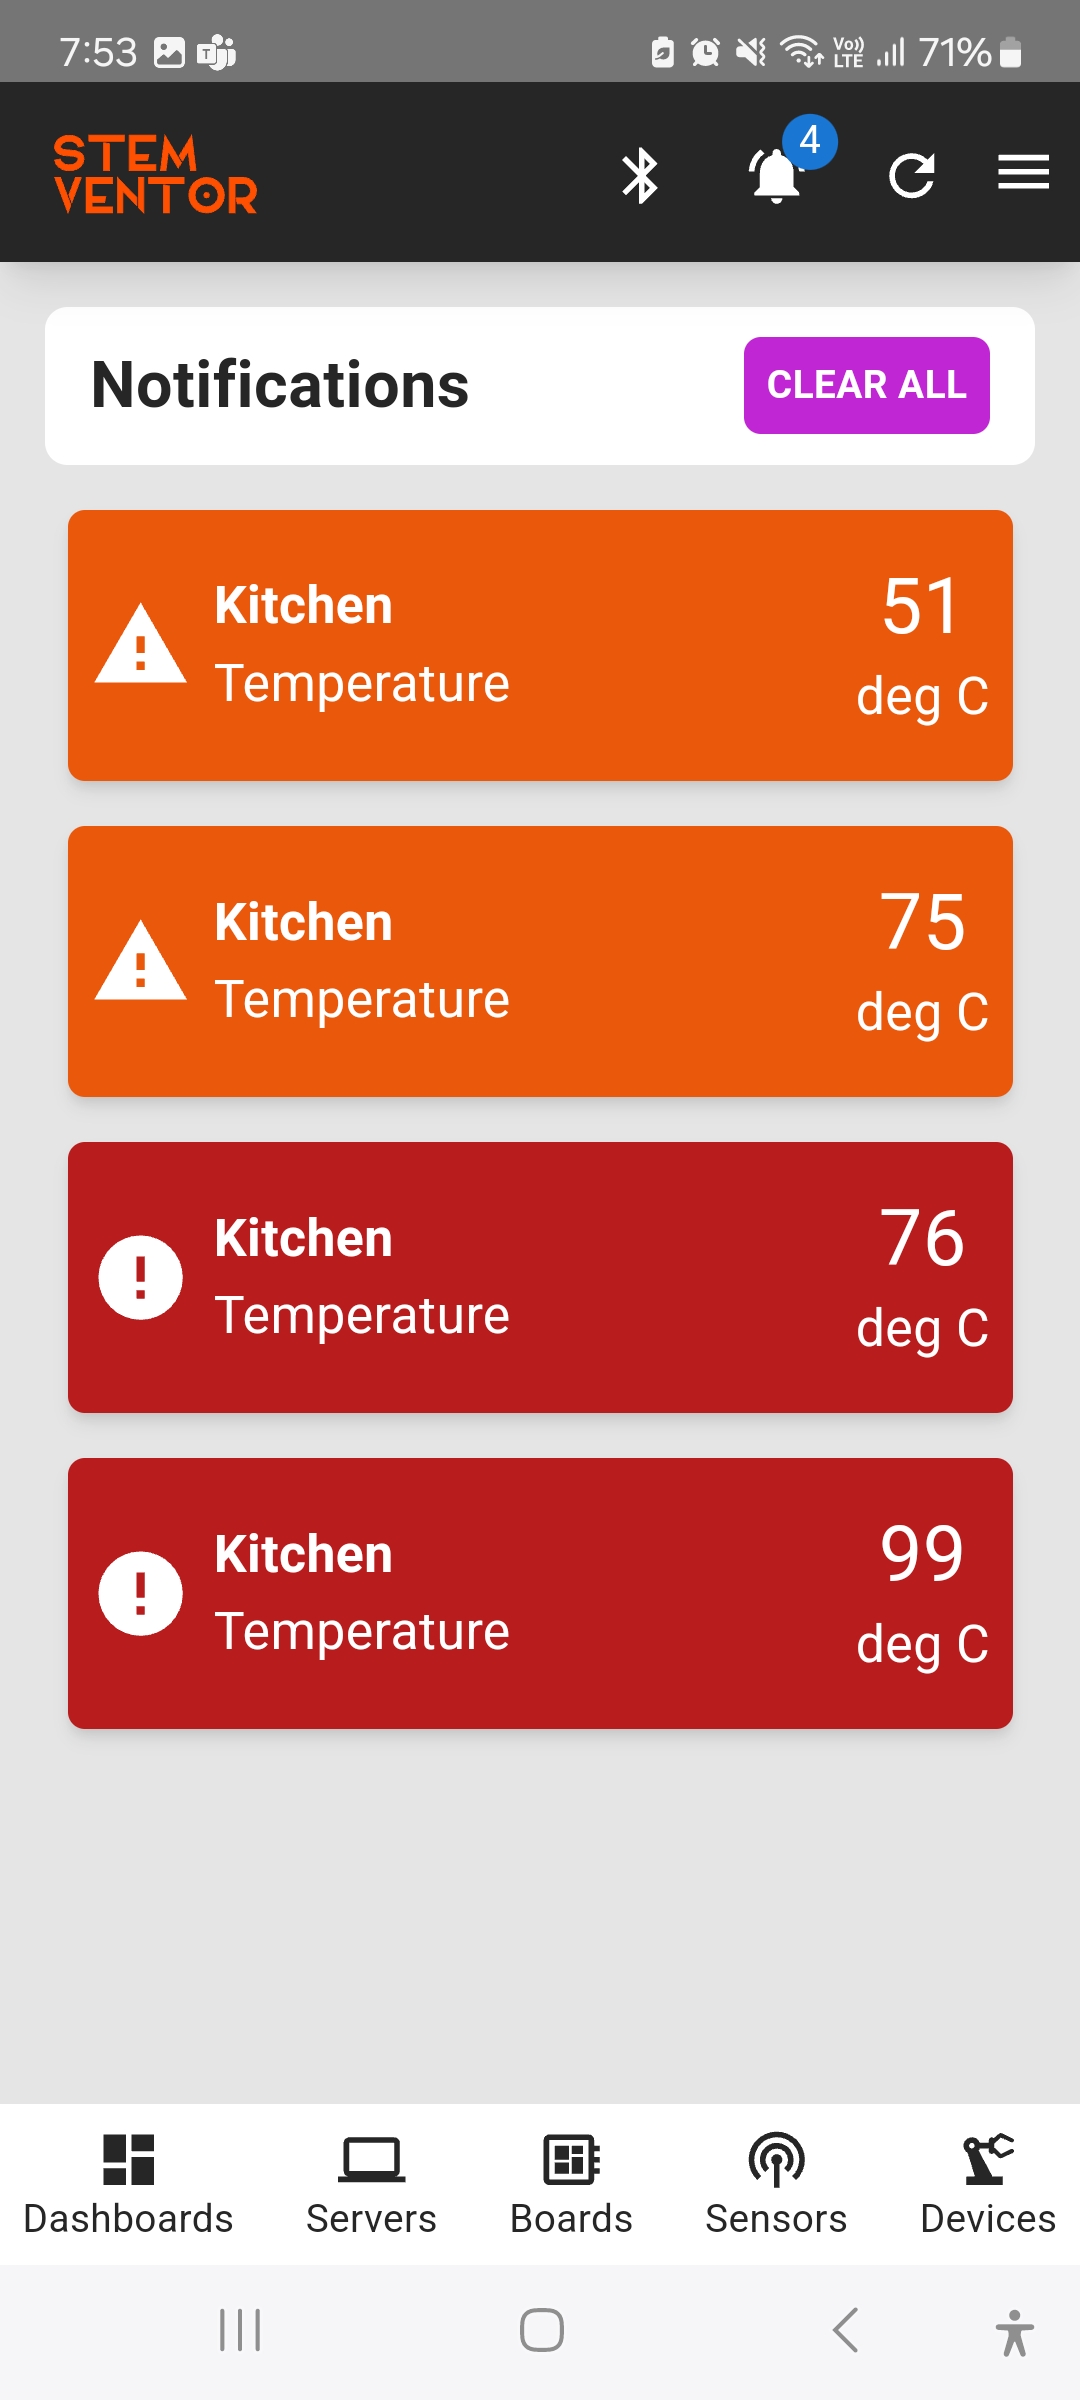
The app can be configured to create notifications when the sensor value is in a specified range.
Devices
Manage Devices
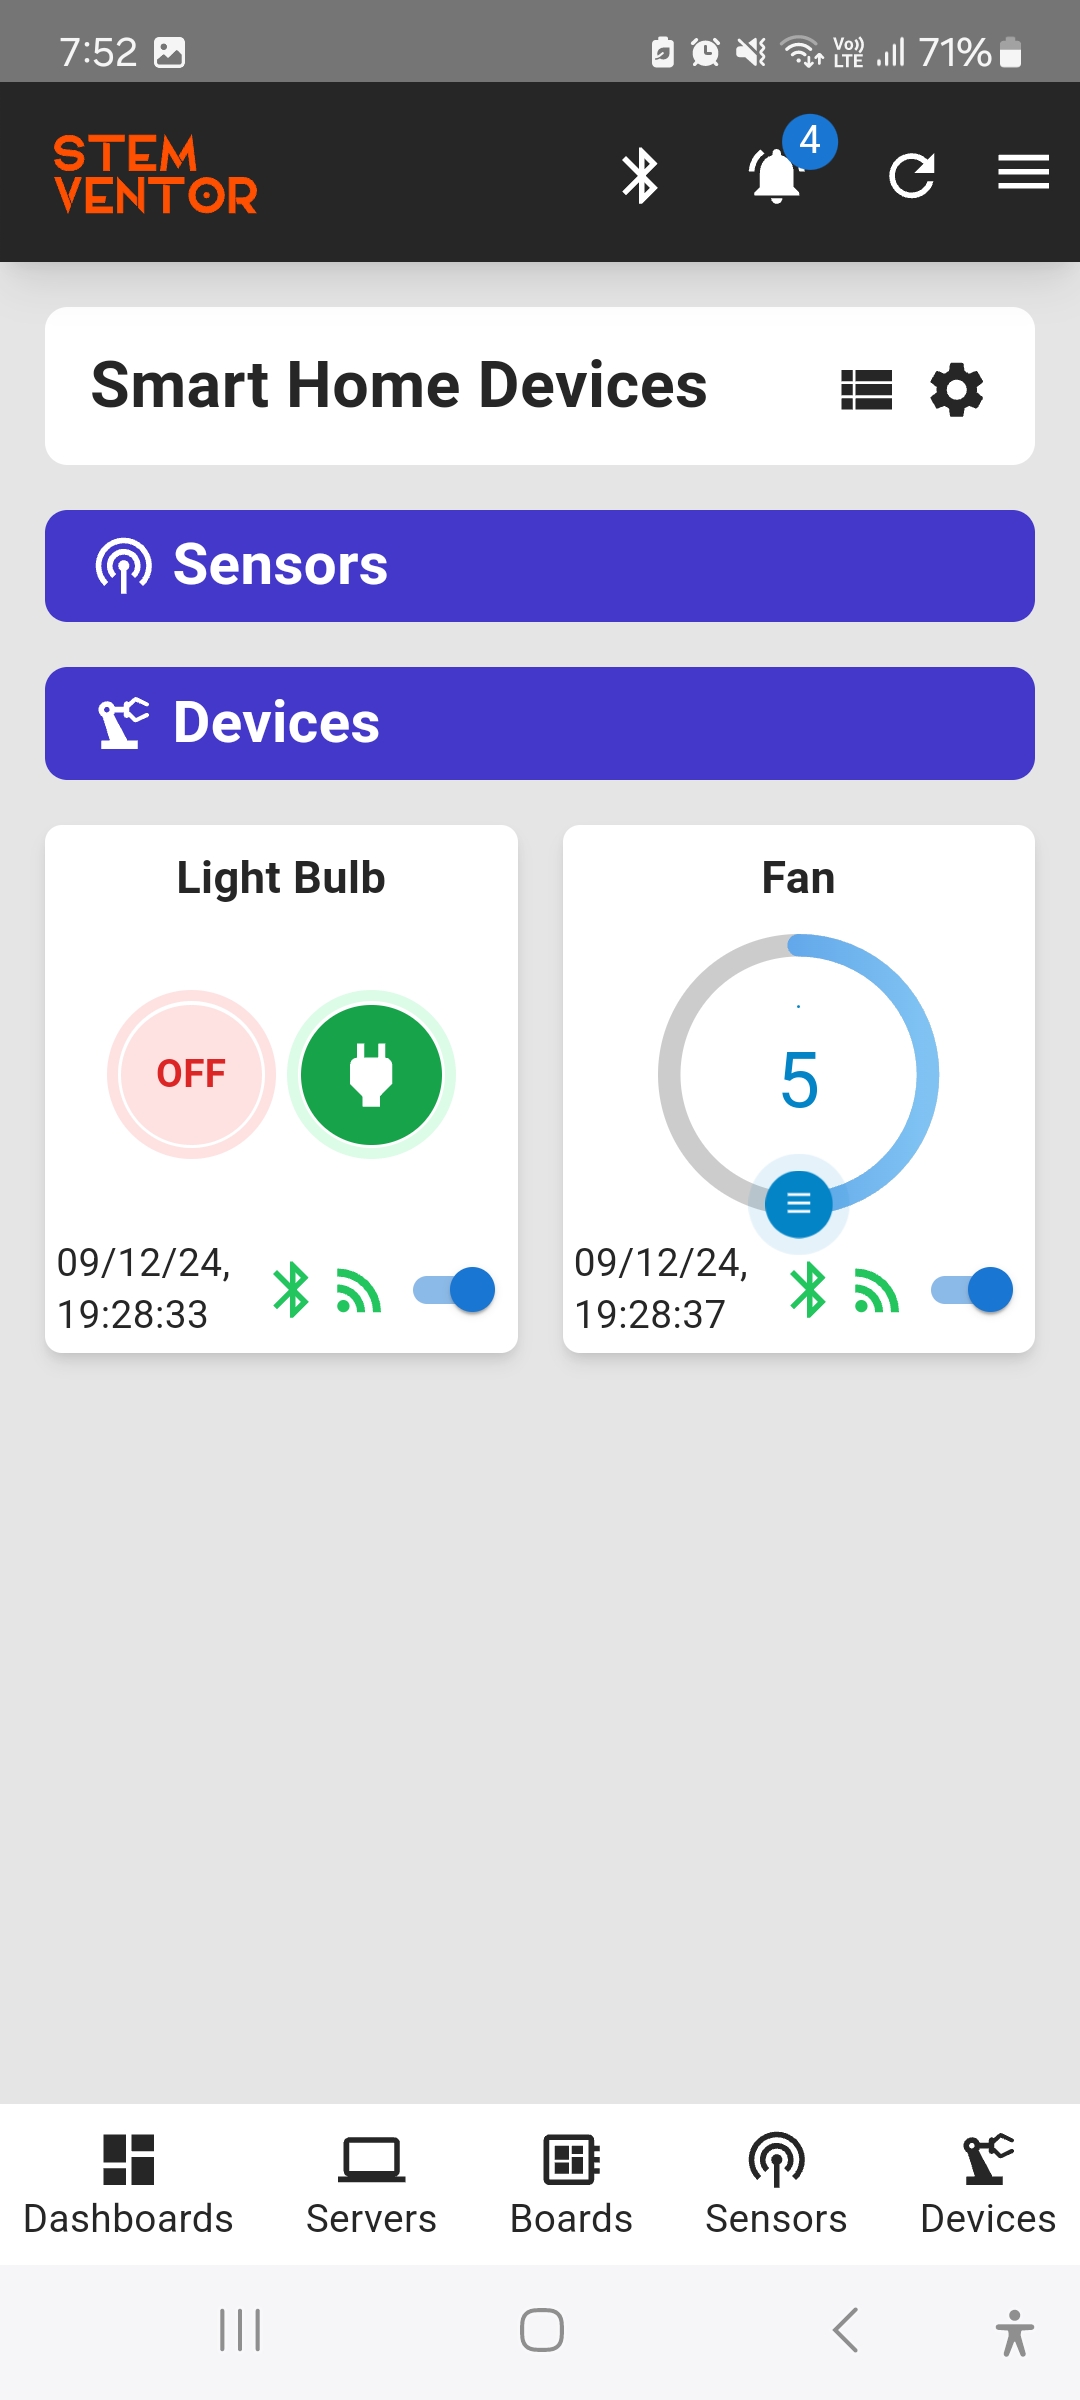
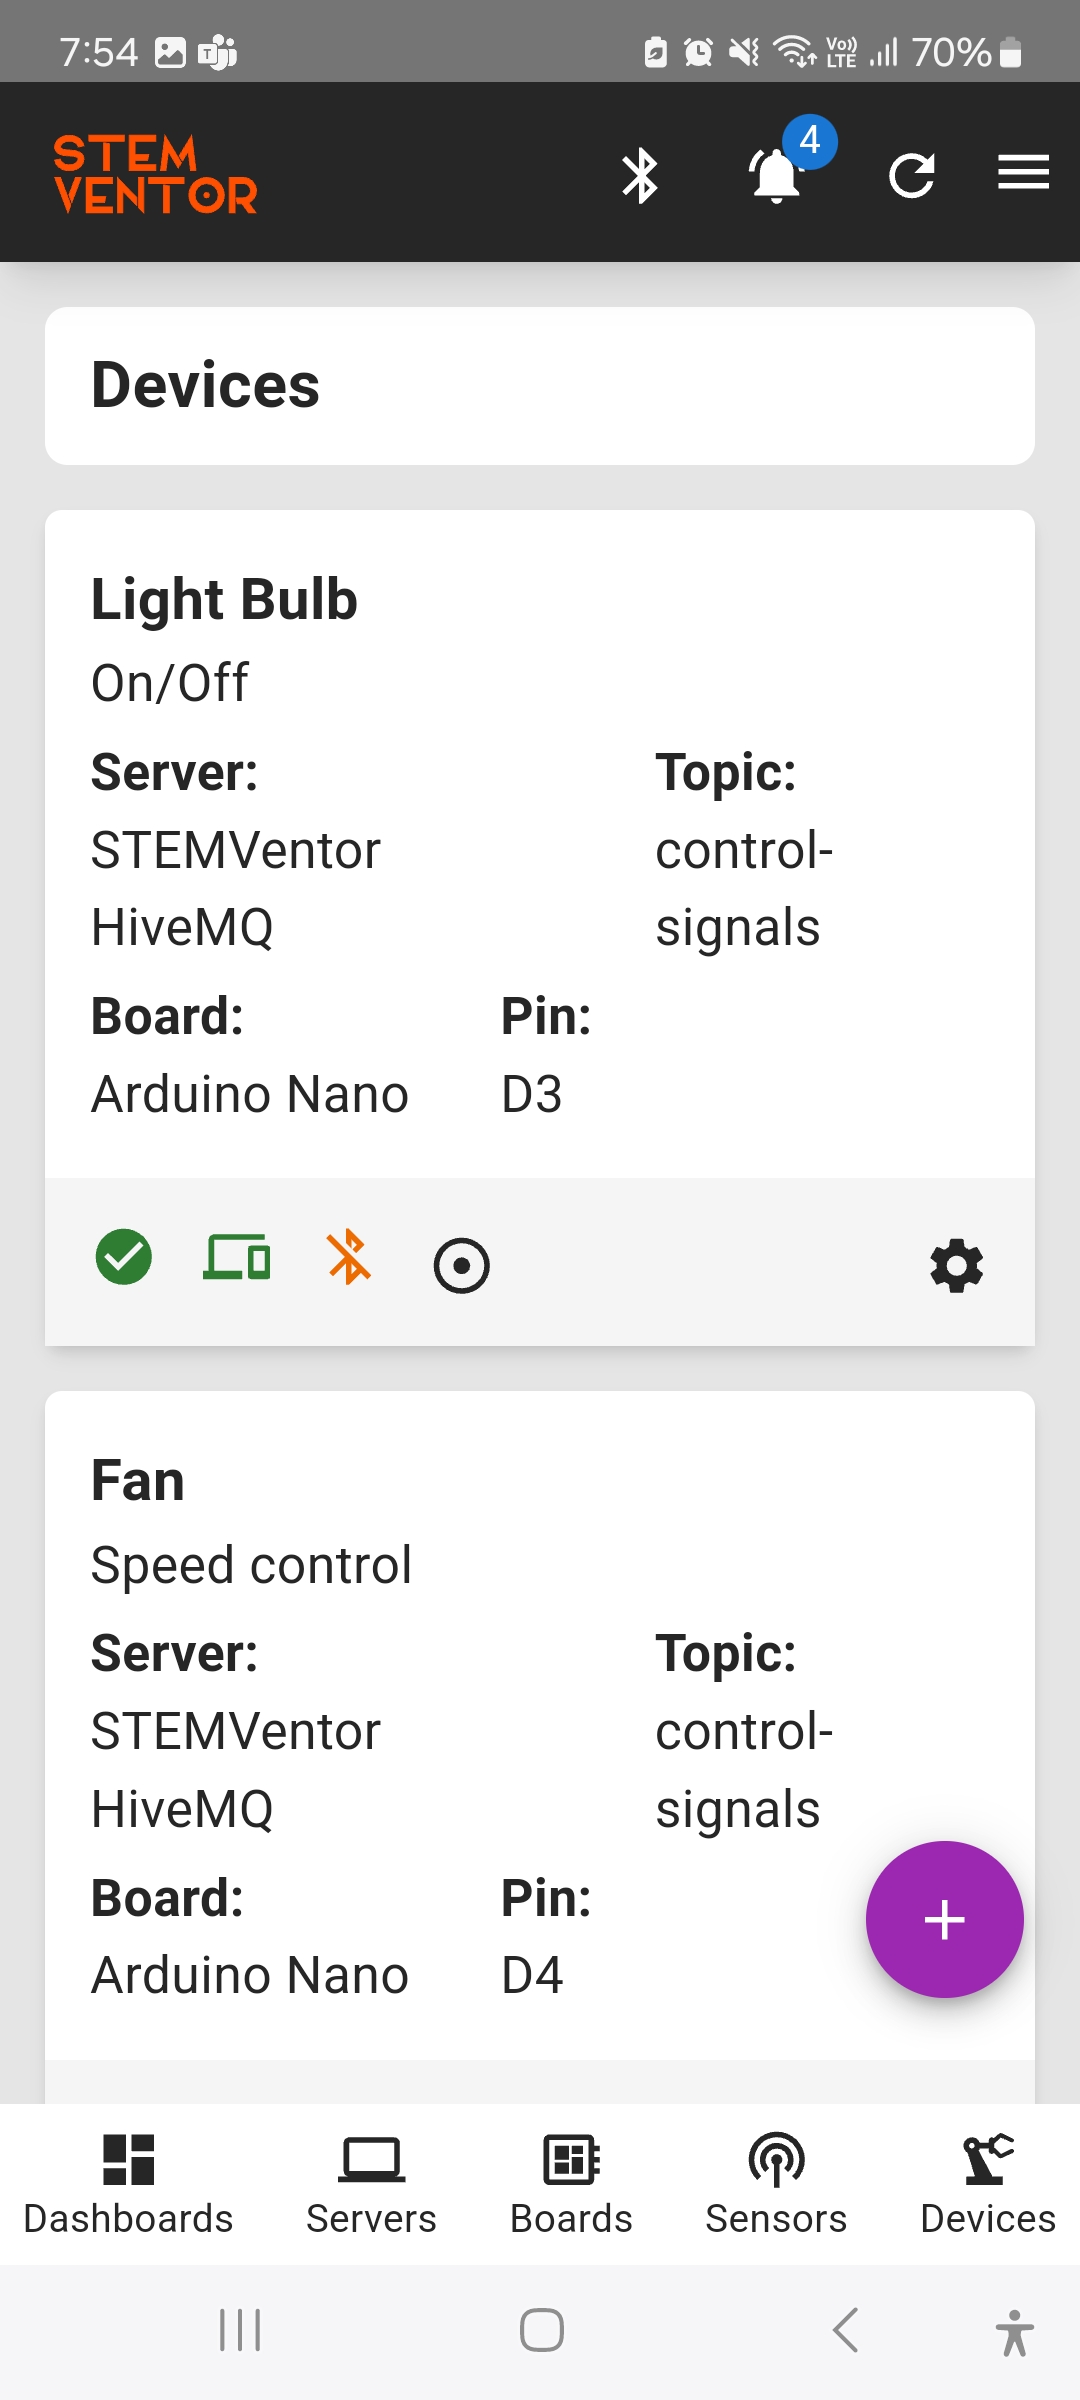
Devices are connected to and are controlled by boards which receive signals sent from the app over MQTT or BLE.
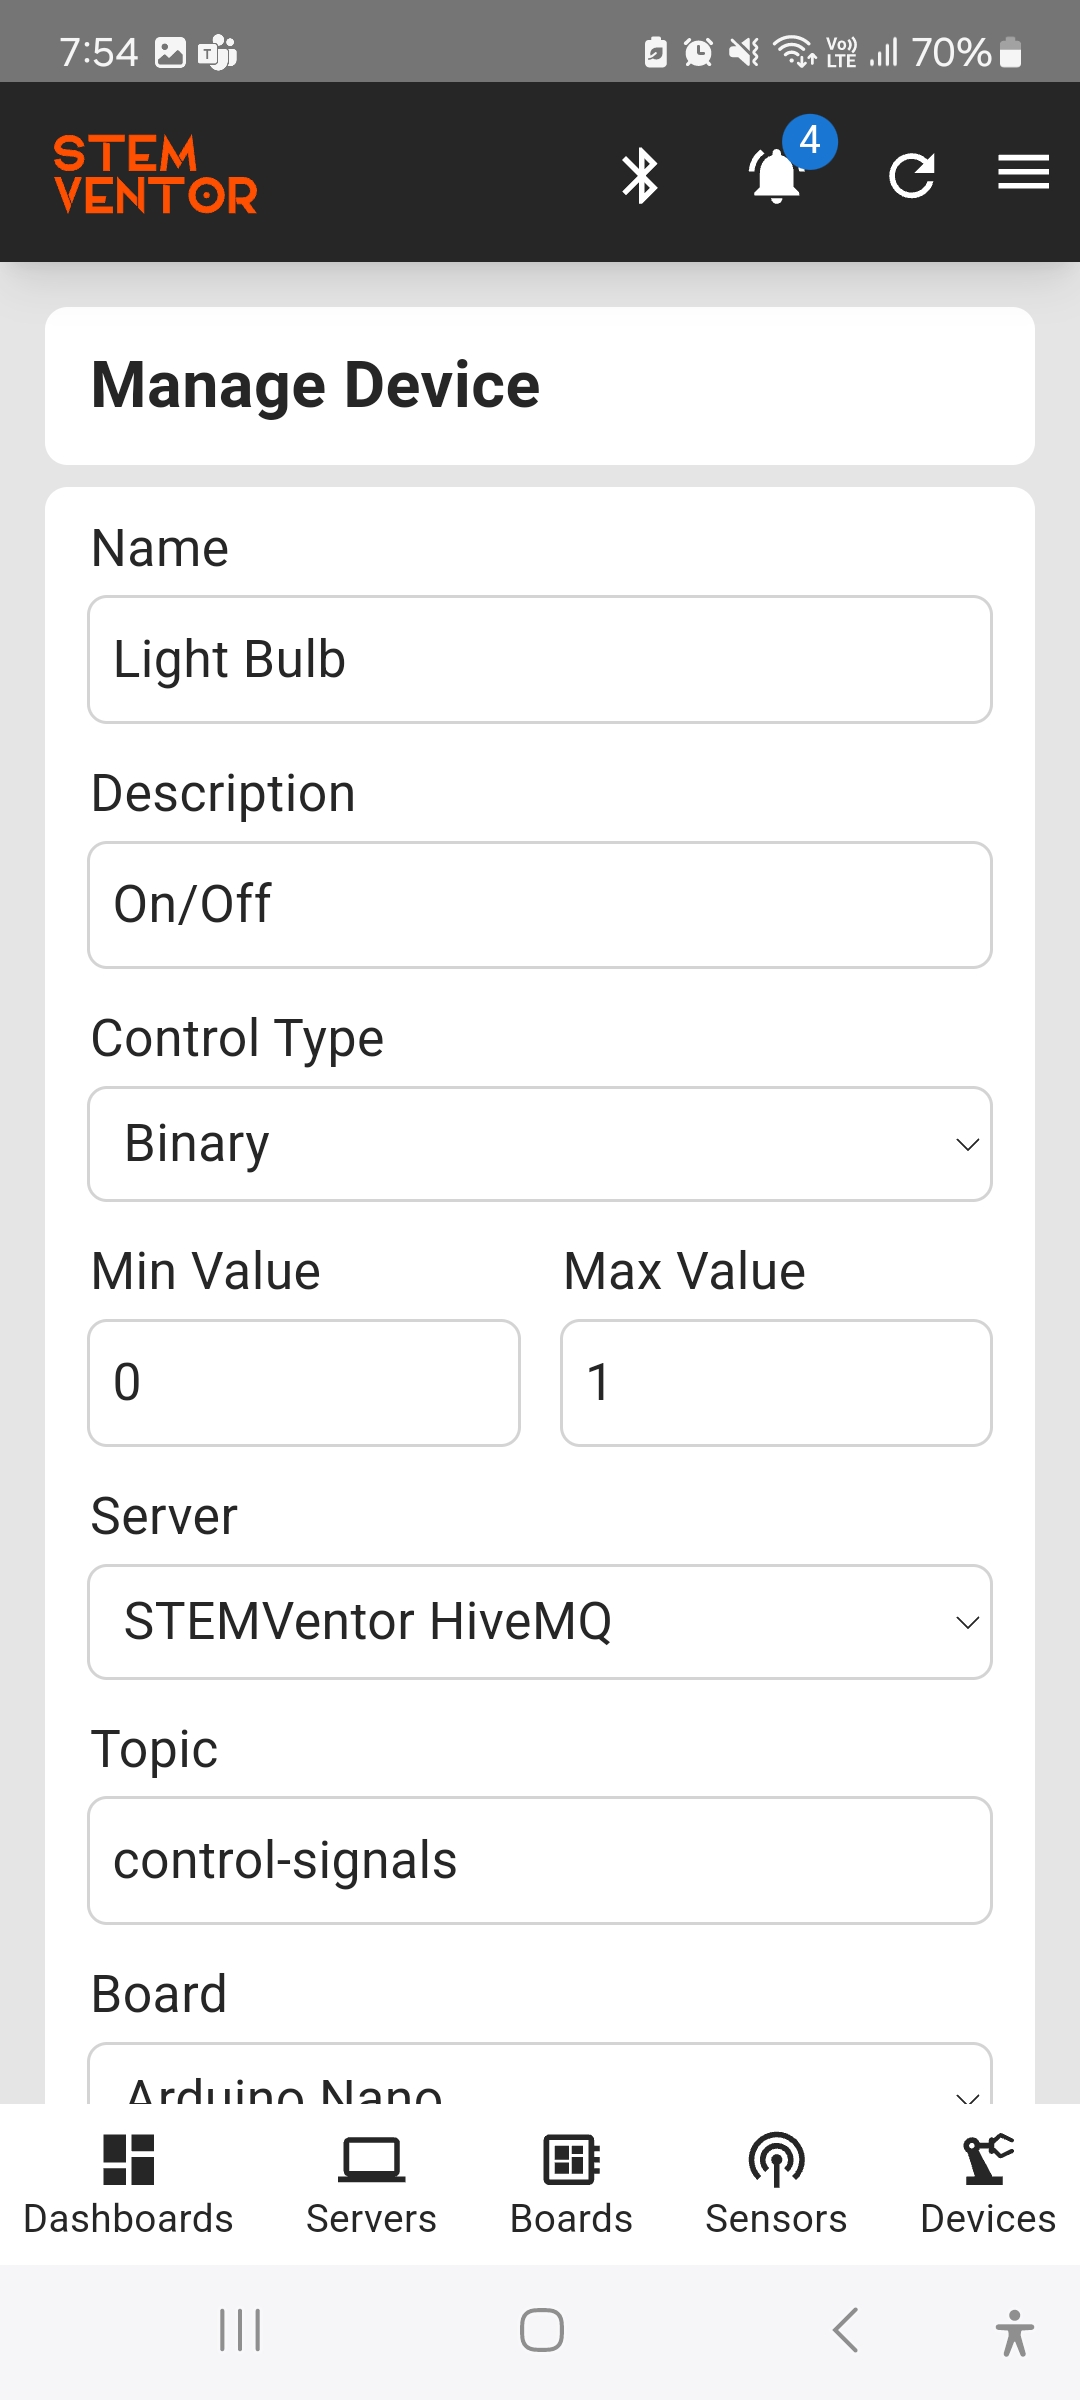
To create a device enter the following details in the form:
- Name
Enter a short name to identify the device. - Description
Enter a short description of the device. - Control Type
Select the control type from the list of supported controls. Current control types are Binary (On/Off) and Analog (Continuous). Binary sends a 0 or 1 control signals and is used to switch a device on or off. Analog sends from a range of values and can be used to control motor speeds or brightness of lights or level of sound. - Min Value
This is the minimum value that the device will accept. This is used to filter out values that are not within the expected range so only correct control values are sent to the board. - Max Value
This is the maximum value that the device will accept. This is used to filter out values that are not within the expected range so only correct control values are sent to the board. - Server
Select a server (MQTT Broker) from the list of configured servers. - Topic
This is the topic on the MQTT Broker that this device will subscribe and read data from. It is auto-generated based on the device name but can be edited. - Board
Select a board from the list of configured boards. The board must be programmed to send data to this device over BLE. - Pin
Enter the pin on the board the device is connected to. This is not used by the app specifically, it only needs to be programmed on the board correctly. The app uses this data to identify pin conflicts. - Show Historical Data
If this is selected the device signal values are stored in memory and you can see a graph with the historical data values. The number of historical data values is limited to 10. - Enabled
The device is enabled by default but can be disabled if you don't want to use it for a while. - BLE Characteristic Name
This is an auto-generated reference name to map the UUID to this device. - BLE Characteristic UUID
This is the auto-generated UUID that must be programmed into the microcontroller that this device is connected to.
Device Pages
Servers
MQTT
MQTT is the preferred protocol standard for communication between components of an IoT solution. It is an asynchronous messaging protocol that uses servers known as brokers. It follows a publish-subscribe (pub-sub) model and uses what are known as topics as the channel for communication.
Manage Servers
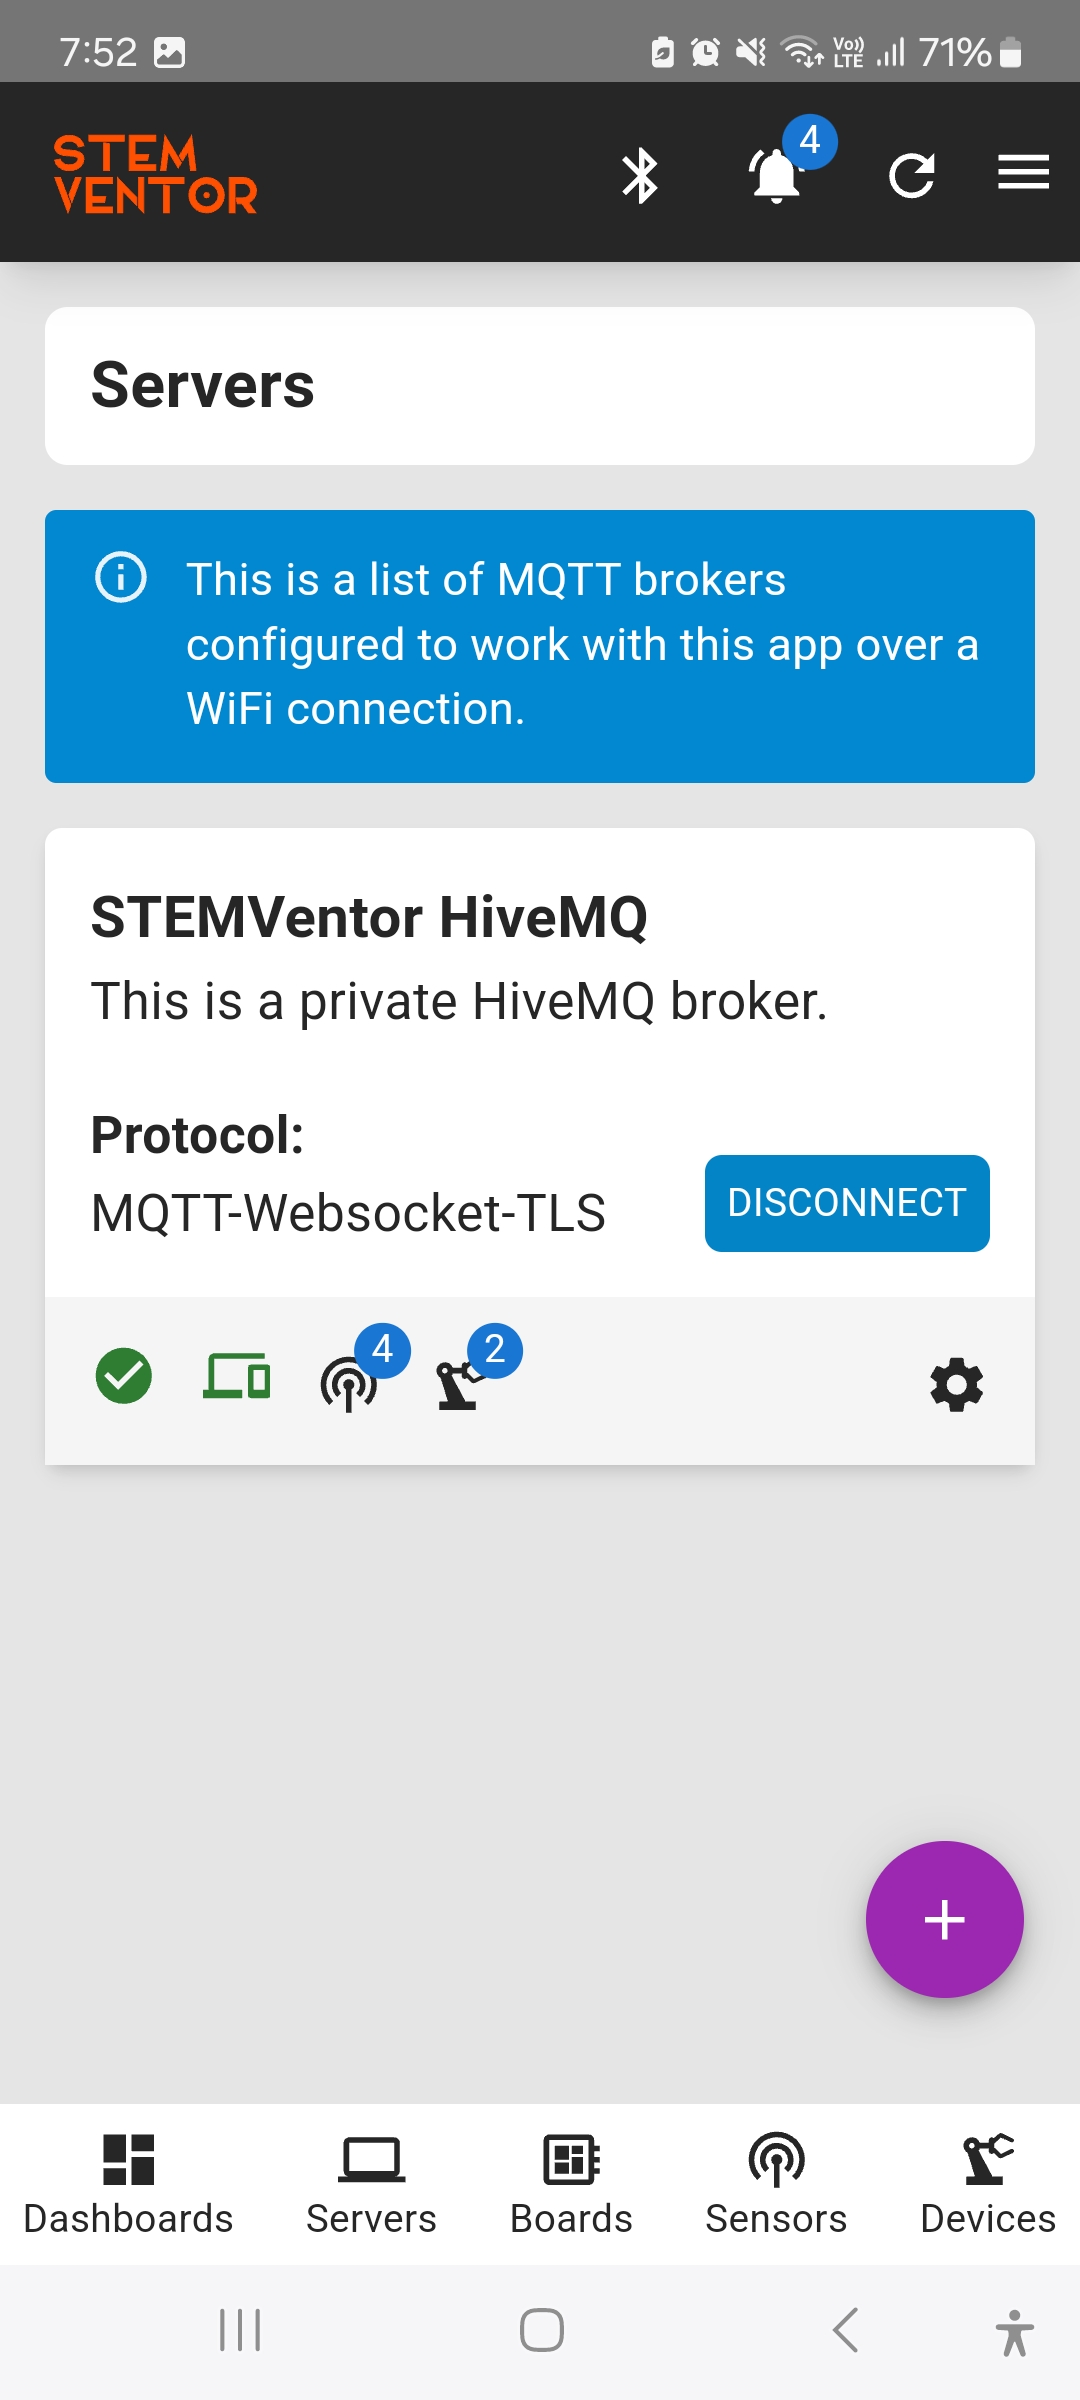
Servers in this context are the MQTT Brokers.
Both protocols further support secure (TLS) and unsecure communication. Brokers listen on specific ports for each protocol. While there are some standard ports, brokers may use any port of their choice (which they will specify in their documentation). Private brokers also require authentication credentials, either a user id and password, or certificates.
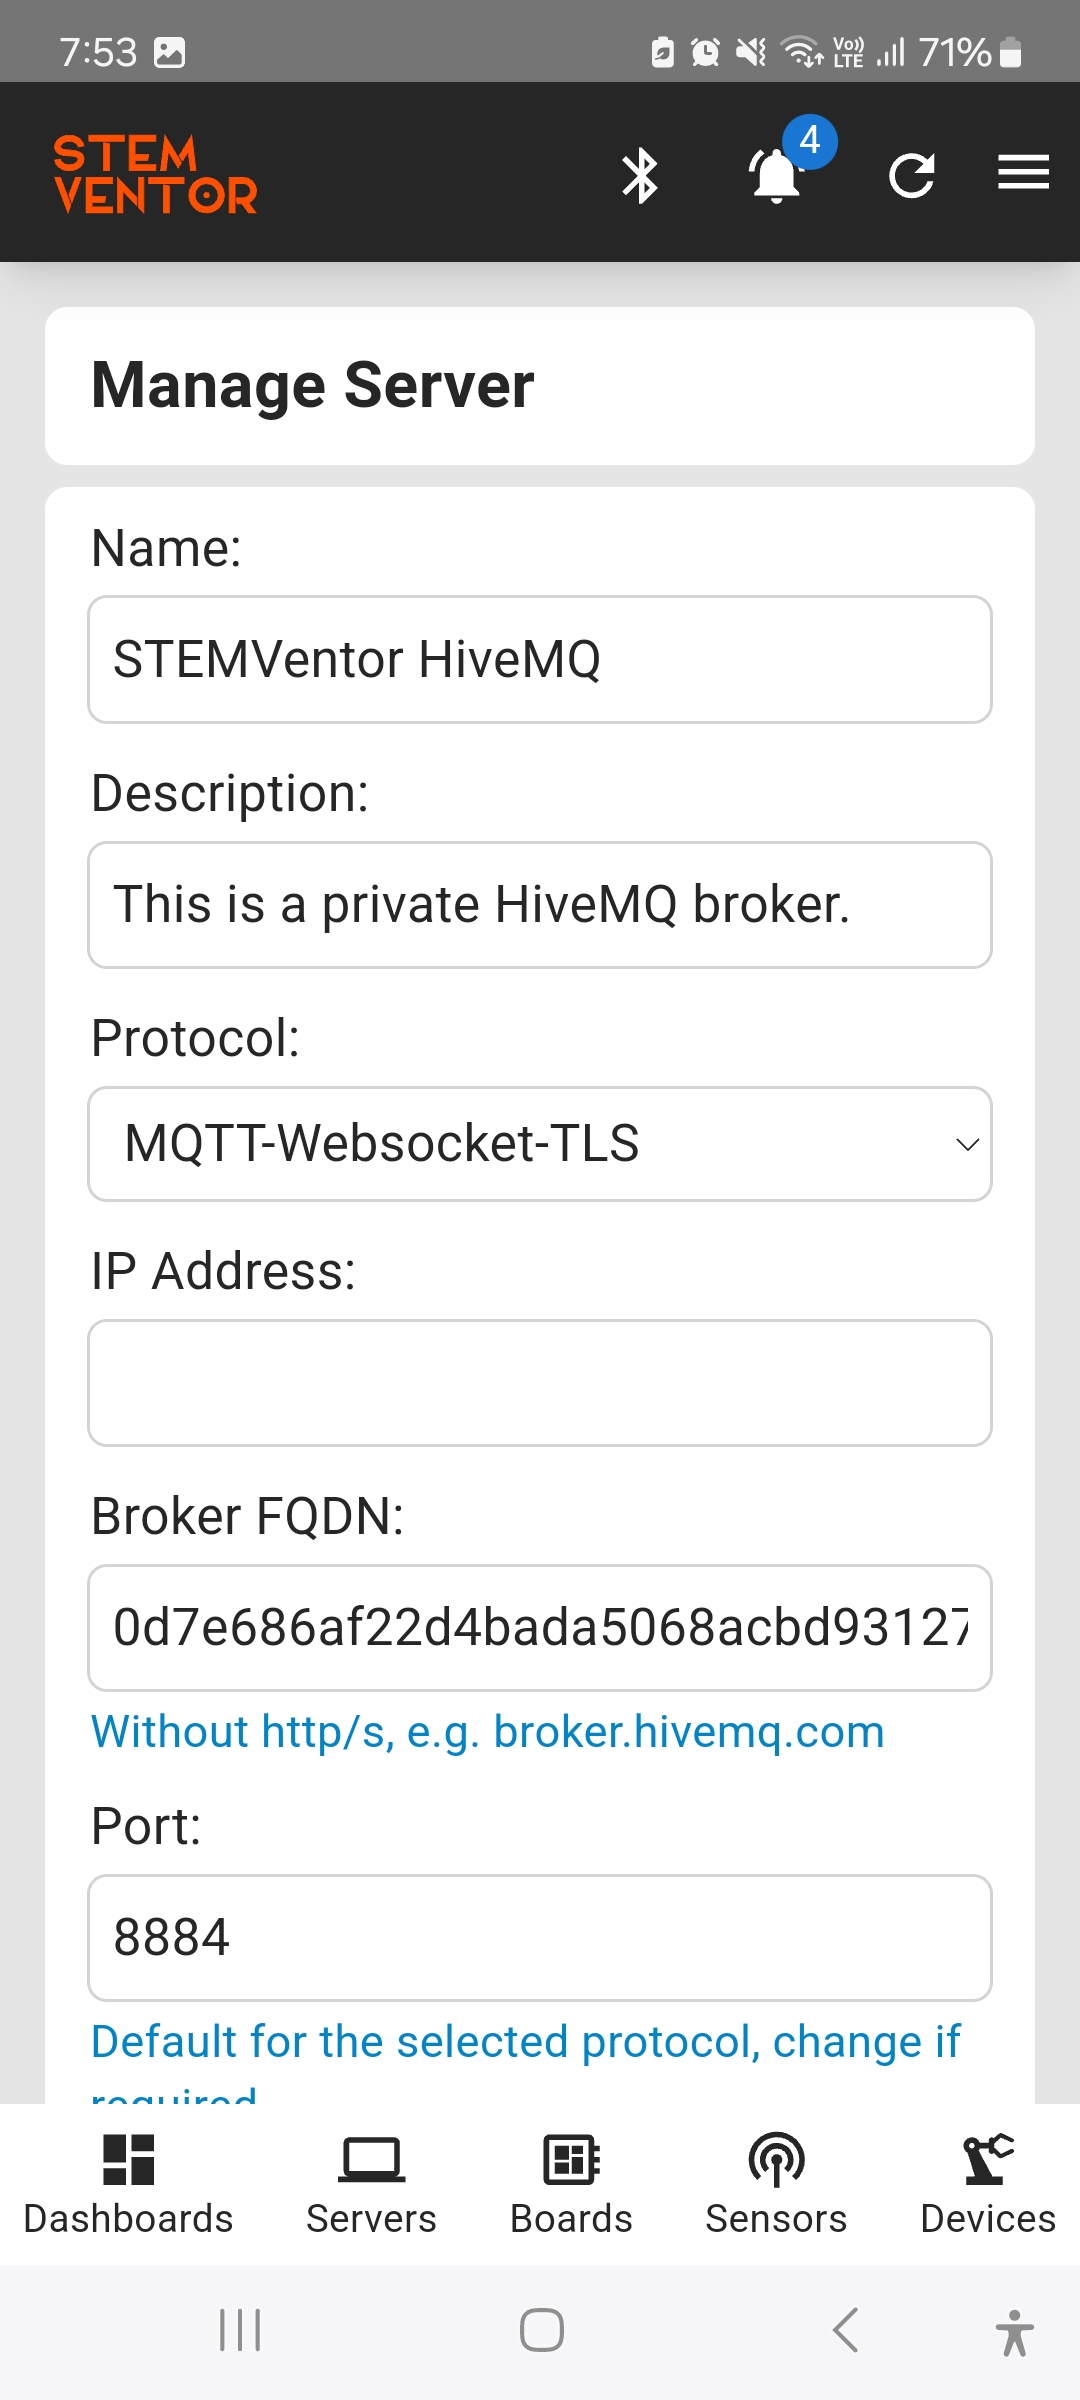
To create a server enter the following details in the form:
- Name
A short name to identify the server. - Description
A short description of the server. - Protocol
Select from the list of supported protocols. - IP Address
Optional, can be used if you are running a local server. - Broker FQDN
Fully Qualified Domain Name similar to those in the list above. - Port
A standard port is pre-entered based on the selected protocol but can be edited. - MQTT URL
This is the complete url with the protocol, FQDN, port, and required suffixes. It is pre-generated based on the values entered but can be edited as specified in the broker documentation. - User Id
Optional, generally required for private brokers. - Password
Optional, generally required for private brokers along with user id. - Enabled
The server is enabled by default but can be disabled if you don't want to use it for a while.
Server Pages
You can connect to and disconnect from servers from the server list page.
