Overview
This project reads digital values from a Vibration sensor and displays the readings on a 20x4 LCD screen with an I2C backpack.Vibration threshold can be adjusted using the screw on the module.
Components
| Component | Purpose |
|---|---|
| Arduino Nano | This will be the microcontroller |
| SW420 sensor | This will be the vibration sensor |
| I2C LCD 20X4 | This will be the LCD display |
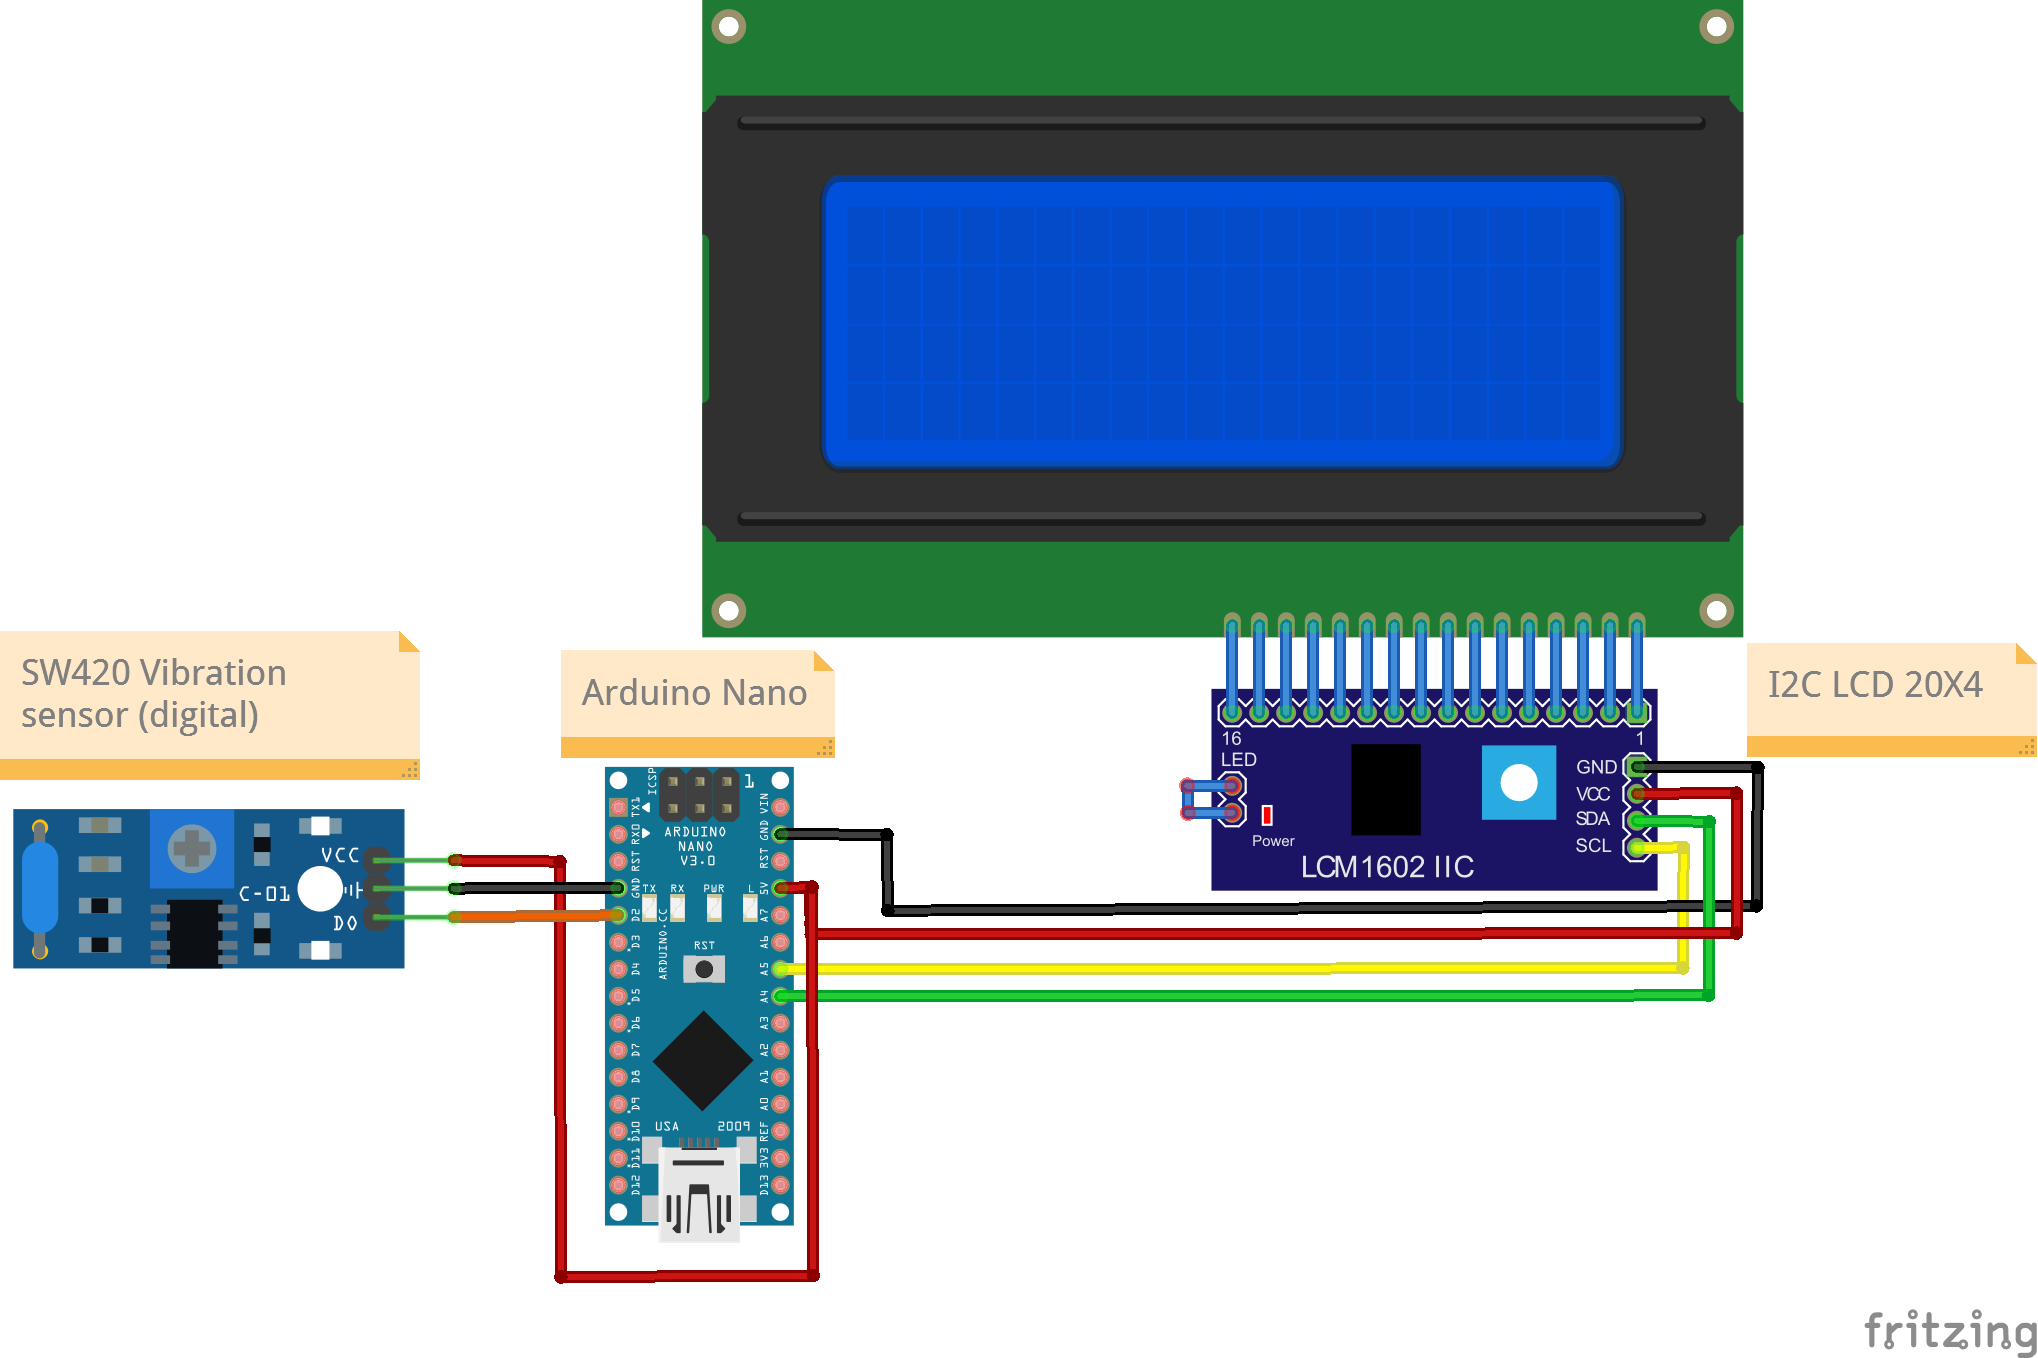
Circuit Diagram
Connections
SW420 vibration sensor
| Nano Pin | IR sensor Pin |
|---|---|
| D2 | Sig |
| 5V | VCC |
| Gnd | Gnd |
I2C LCD Pin
| Nano Pin | I2C LCD Pin |
|---|---|
| A4 | SDA |
| A5 | SCL |
| 5V | VCC |
| GND | GND |
Code
/*
  Project: Vibration Sensor value reading with output on LCD with I2C Backpack
  Project Description:
  This sketch writes readings read from a vibration sensor to an LCD display module.
  This sketch is for a 20x4 screen.

  Author: STEMVentor Educonsulting

  This code is copyrighted. Please do not reuse or share for any purpose other than for learning with subscribed STEMVentor programs.
  This code is for educational purposes only and is not for production use.
*/

// LIBRARIES

// Used for communicating with I2C devices
#include <Wire.h>

// Library for controlling LCD over I2C
#include <LiquidCrystal_I2C.h>


// PIN DEFINITIONS

// GLOBAL VARIABLES
// Define the display size
const byte Rows = 4;
const byte Cols = 20;

// used to display sensor reading on lcd
String sensorValue;
// Define the pin to which the vibration sensor is connected
#define VibrationSensorPin 2

/* INITIALIZE OBJECTS */
/*
 * All I2C components have an address, the default is usually 0x27
 * If that doesn't work, see this:https://playground.arduino.cc/Main/I2cScanner/
 * The init statement accepts the address and the number of columns and rows.
 */
LiquidCrystal_I2C lcd(0x27, Cols, Rows);

/* LOCAL FUNCTIONS */

void readSw420() {  // Digital read vibration sensor
  int vibrationValue = digitalRead(VibrationSensorPin);
  if (vibrationValue == 1) {
    sensorValue = "High";
  }
  else {
    sensorValue = "Low";
  }
}

/*
  Function to print to LCD on a single row.
  Takes the row number and the text to display on that row (max 20 chars, rest will be truncated).
  The entire display is cleared if the clearAll flag is true, else only the row is cleared (the default).
 */
void printToLcdByRow(int row, String text, bool clearAll = false) {
  const char* twentySpaces = "                    ";

  if (clearAll) {
    lcd.clear(); // Clears the entire display
  }

  lcd.setCursor(0, row - 1);
  lcd.print(twentySpaces); // Clears the row
  lcd.setCursor(0, row - 1); // Cursor has to be set again after printing spaces
  lcd.print(text);
}

/*
 Function to print to LCD across rows with each row having 20 chars.
 Messages can be a maximum of 20x4 chars, rest will be truncated.
 The entire display is cleared before printing the text.
 Test string of 20 char:
 12345678901234567890
 Test strings of 80 chars:
 12345678901234567890123456789012345678901234567890123456789012345678901234567890
 Lorem ipsum dolor sit amet, consectetur adipiscing elit. Donec varius est donec.

 */
void printToLcd(String text) {
  lcd.clear(); // Clears the entire display

  byte charsRemaining = text.length();
  byte charFrom = 0;
  byte charTo = charsRemaining < Cols ? text.length() : charFrom + Cols;
  byte row = 1;

  while (charsRemaining > 0) {
    String line = text.substring(charFrom, charTo);
    printToLcdByRow(row, line);

    charsRemaining = text.length() - charTo;
    charFrom = charTo;
    charTo = charsRemaining < Cols ? text.length() : charFrom + Cols;
    row++;
  }

  Serial.println("Data string has been displayed on LCD");
}

void lcdSetup() { // Function to LCD setup
  // Initializing wire
  Wire.begin();
  // Initialize the LCD.
  lcd.init();
  // Turn on the backlight and print a message.
  lcd.backlight();
  // Use the function to display text on each line individually.
  printToLcdByRow(1, "I2C LCD Ready!", true);
  printToLcdByRow(2, "Enter some text.", false);
  printToLcdByRow(3, "Max 80 characters.", false);
  printToLcdByRow(4, "For a 20x4 LCD.", false);
}

void sw420Setup() {
   // Define the pinMode
  pinMode(VibrationSensorPin , INPUT);
}

/* SETUP CODE: Runs once when the board starts up or resets */
void setup() {
  // Start the serial communication with baud rate suitable for your components.
  Serial.begin(9600);
  lcdSetup();
  sw420Setup();
  Serial.println("The board is ready!");
  printToLcdByRow(1, "Vibration Value:", true);
}

/* MAIN LOOP: Runs repeatedly at a very high frequency (1000s of times a second) */
void loop() {
  delay(1000);
  readSw420();
  printToLcdByRow(2, sensorValue, false);
}